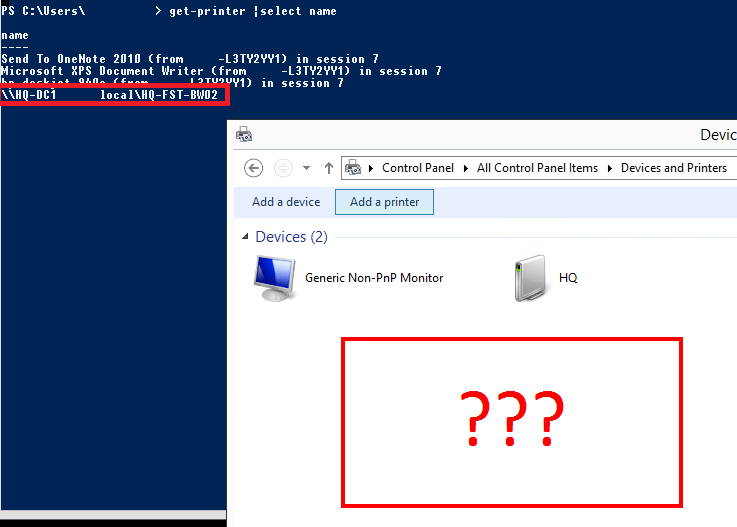
Starting with Windows Server 2012 R2 Citrix Administrators have to face the problem, that the new Device And Printers view doesn’t work as expected. Connected network printers are often not visible, or to bring it on point: Invisible to the end user. There are several sources on the internet, that describe this pain, for example:
- https://support.citrix.com/article/CTX213540
- https://discussions.citrix.com/topic/353573-printers-not-appearing-in-xenapp-75-windows-2012r2/
To face that issue, it is a valid workaround to publish the classic Printers Folder known from Windows 7 and Windows Server 2008 R2, to your end users. In this view, the problem with the invisible printers doesn’t exit. Additionally we give the users the possibility to get access to the session network printer mapping and the default printer settings.
We have several ways to offer the classic Printers Folder to our end users:
- Create a shortcut in the public start menu or on the public desktop
- Create a published application in Citrix Studio
- Create a managed application shortcut in Citrix Workspace Environment Management (WEM)
- Give the users access to the WEM Manage Printers application
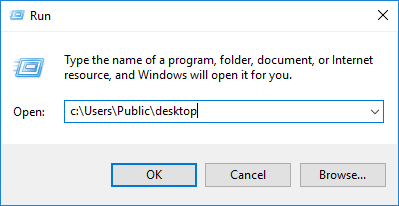
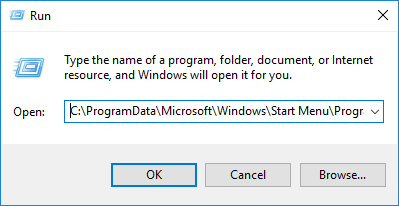
Create a shortcut in the public start menu or on the public desktop
First go to either:
- c:\Users\Public\desktop
- C:\ProgramData\Microsoft\Windows\Start Menu\Programs
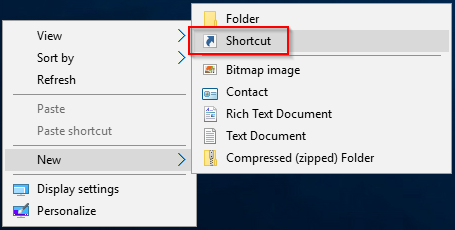
Create a new shortcut:
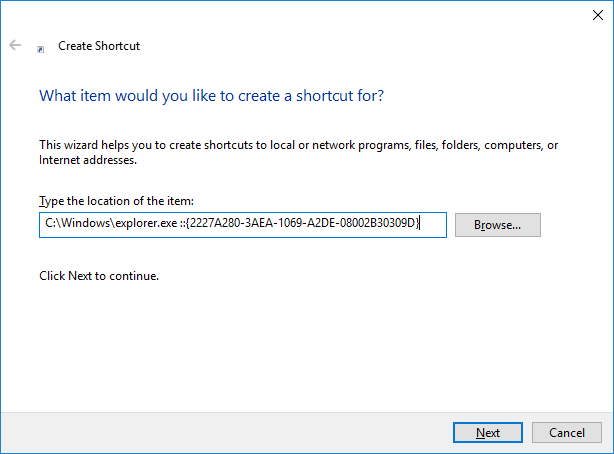
Fill in the location:
C:\Windows\explorer.exe ::{2227A280-3AEA-1069-A2DE-08002B30309D}
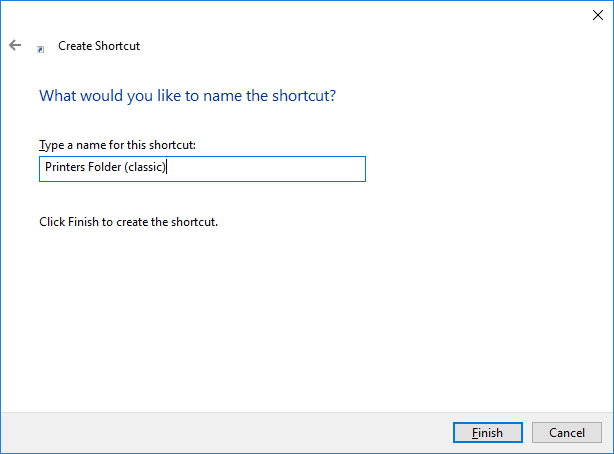
Give it a name:
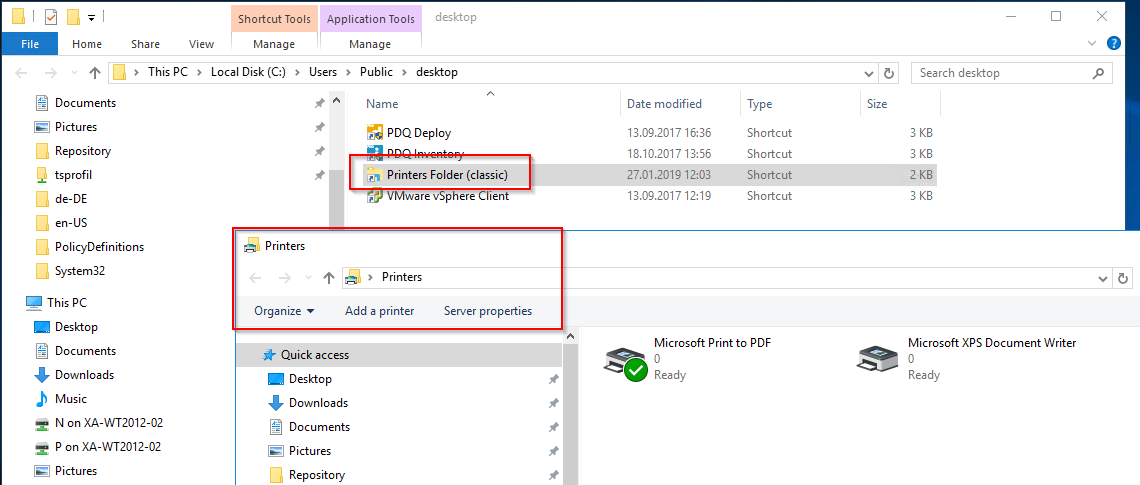
And you are ready to go!
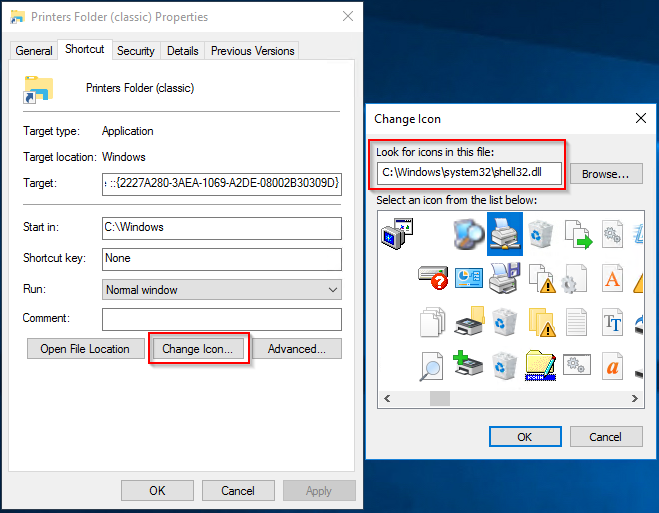
Optionally you can change the shortcut icon in the properties:
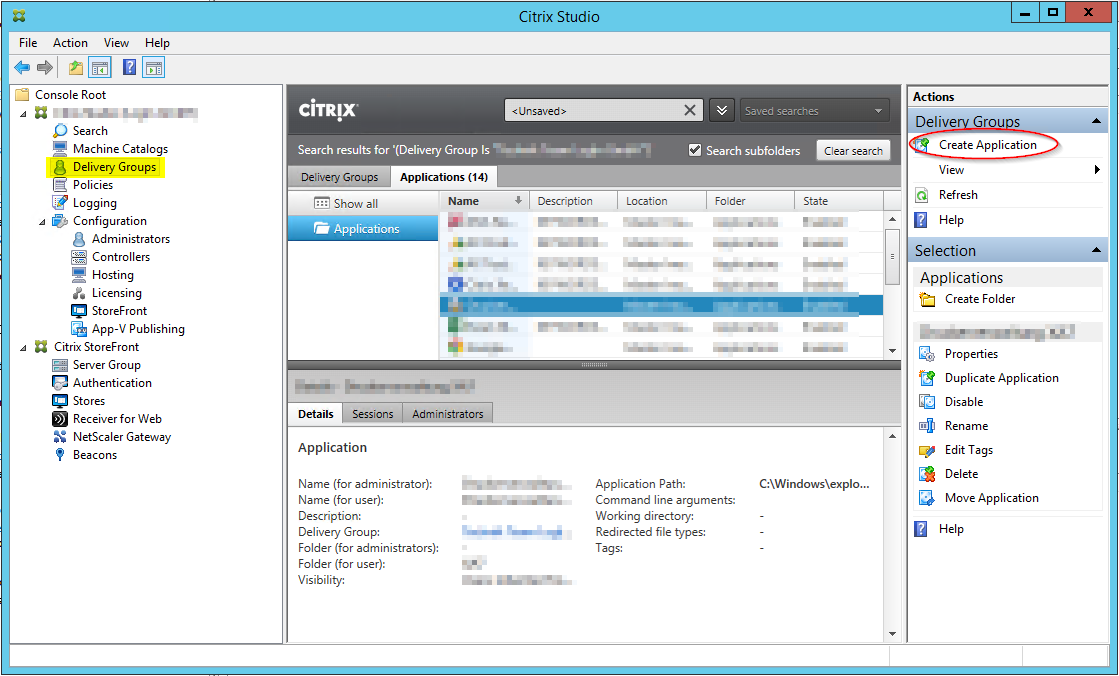
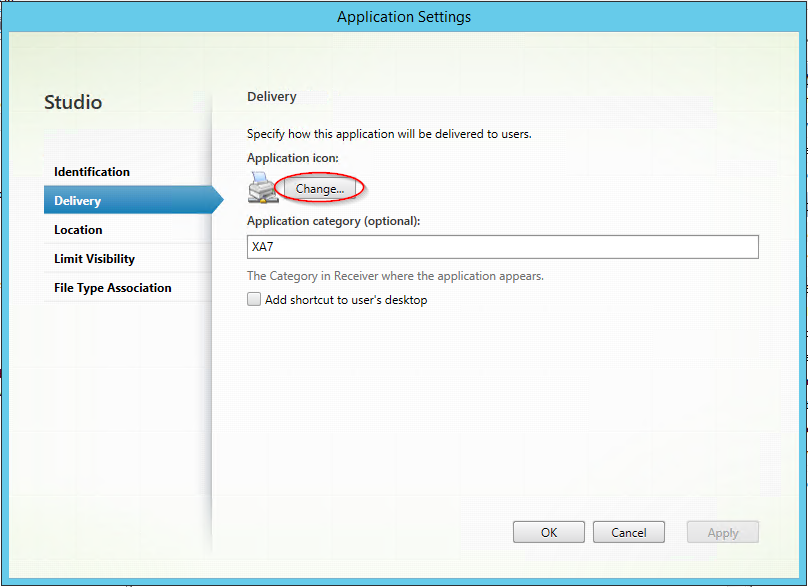
Create a published application in Citrix Studio
Open Citrix Studio and create a new application:
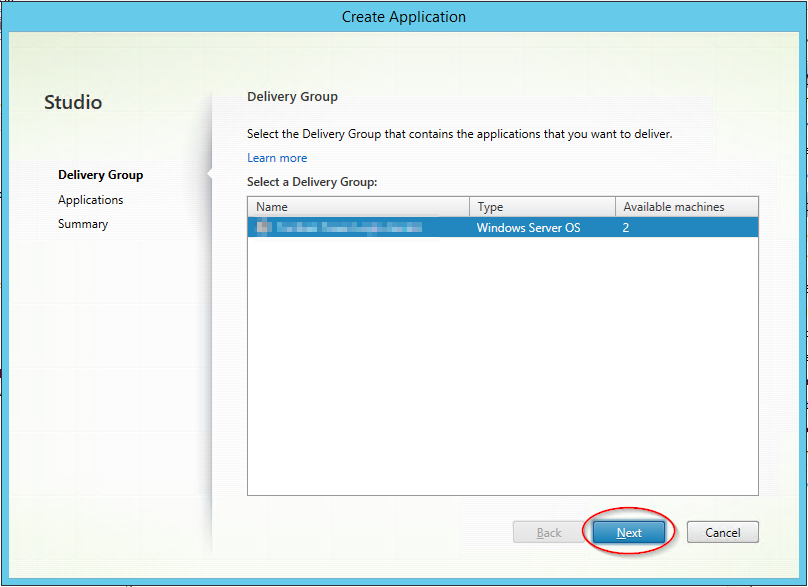
Choose your Delivery Group:
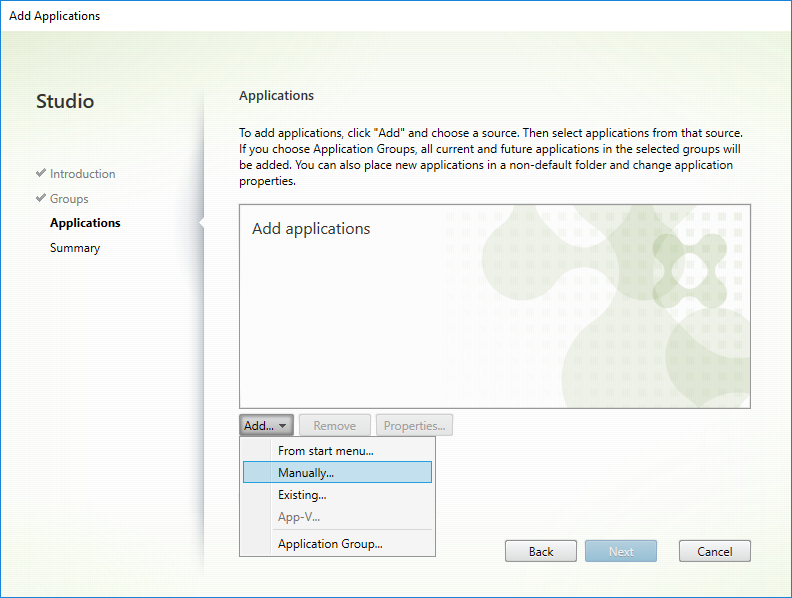
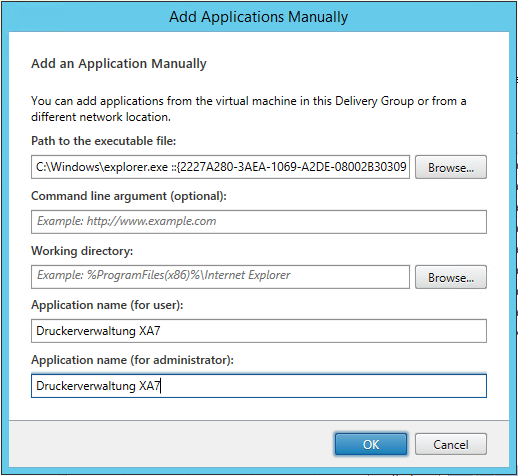
Add a new application manually:
Path to the executable file:
C:\Windows\explorer.exe ::{2227A280-3AEA-1069-A2DE-08002B30309D}
Name: Classic printers folder
The other fields stay empty.
Optionally you can switch into the application properties and adjust the shortcut icon:
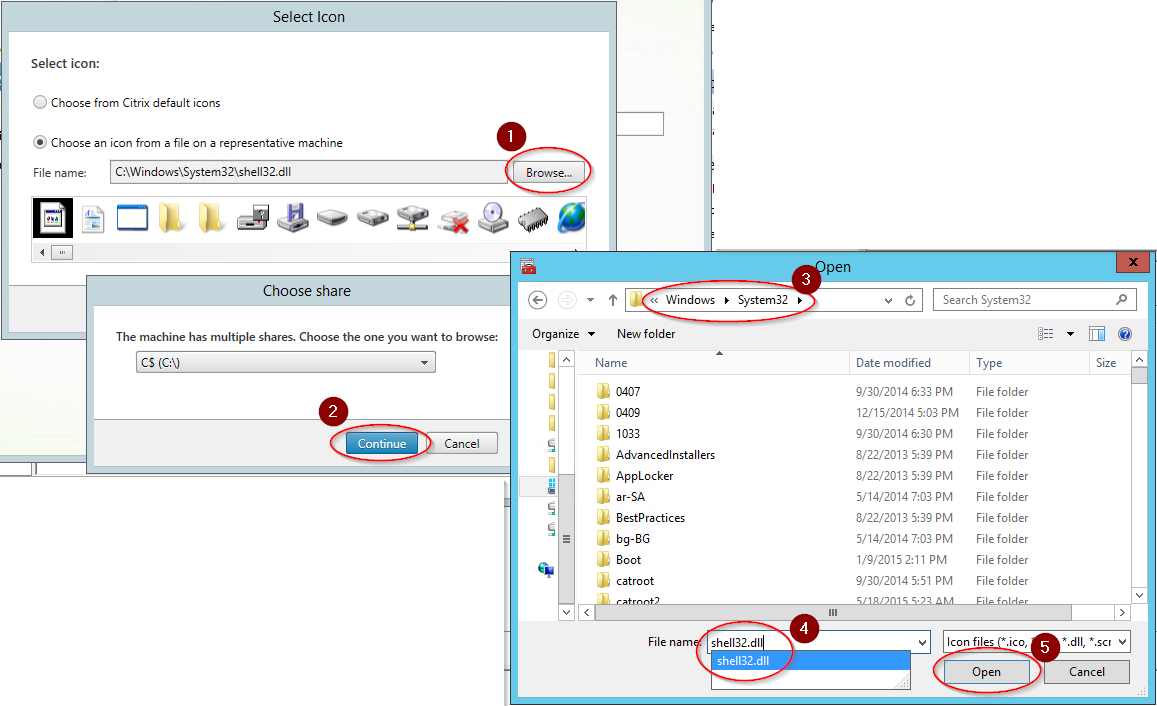
Select Browse (1)
Select the administrative share of the c:\ partition (2)
Switch to the path C:\Windows\system32\ (3)
Choose the file shell32.dll (4)
and confirm your selection (5)
Now you are able to choose a symbol that fits your desire.
Now you confirm all open dialogs and are ready to go!
Create a managed application shortcut in Citrix Workspace Environment Management (WEM)
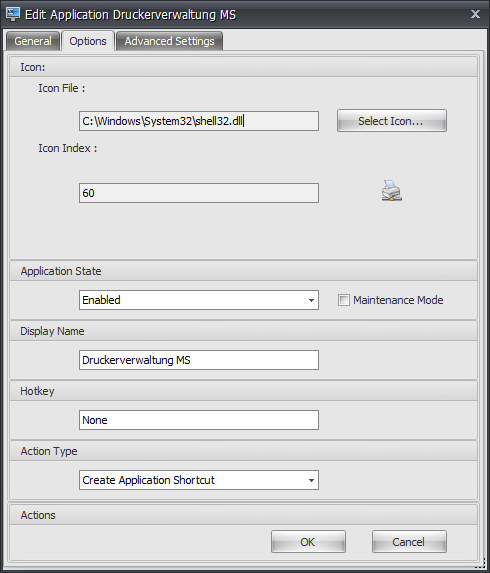
Classic Printers Folder
Open your WEM Administration Console and connect to your WEM Infrastructure Broker:
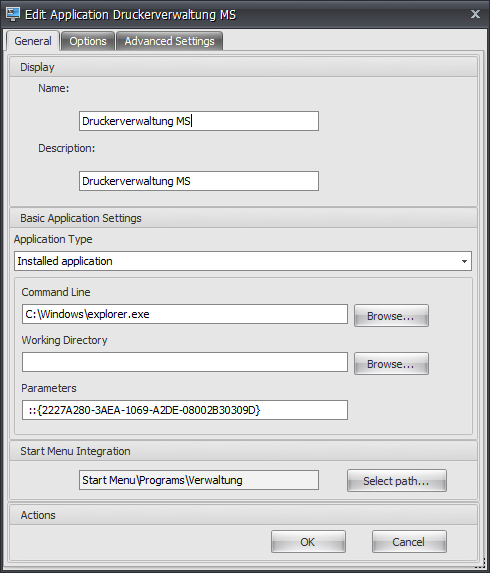
Create a New application and configure it as follows:
Name: Classic Printers Folder
Description: Classic Printers Folder
Application Type: Installed application
Command Line: C:\Windows\explorer.exe
Working Directory: -
Parameters: ::{2227A280-3AEA-1069-A2DE-08002B30309D}Take caution that the Parameter has a leading space!
In the Applications Options you can once more select a icon that fits your needs from the C:\Windows\System32\shell32.dll if you like.
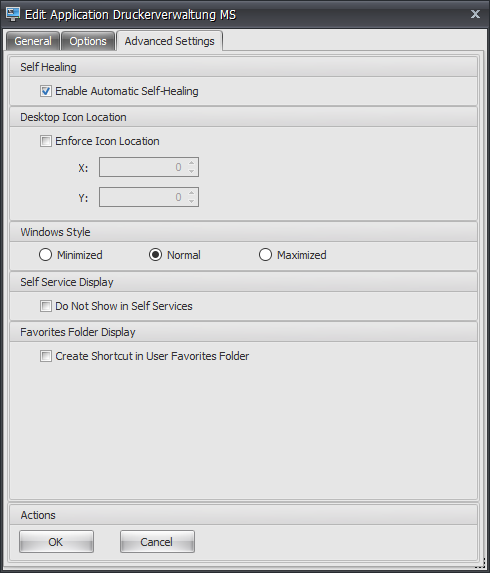
In the Advanced Settings you should consider enabling Automatic Self-Healing:
WEM Manage Printers
As a Citrix Workspace Environment Management eligible customer you have an additional fourth option available. WEM provides several tools to make the Administrators life much easier. One of them is the Manage Printers GUI for the end users.
(Pingback to EUC expert James Kindon who has a great blog post about these tools available! Read it!)
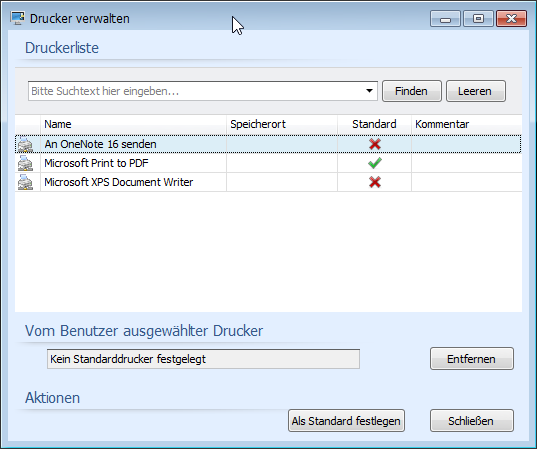
This tool is available to the end users in a published desktop through the WEM tray icon.
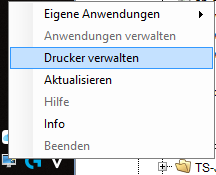
If your end users work with published applications or you disable the tray icon you can instead publish it as a WEM managed application shortcut or as a Citrix Studio published application. I will show you the first one:
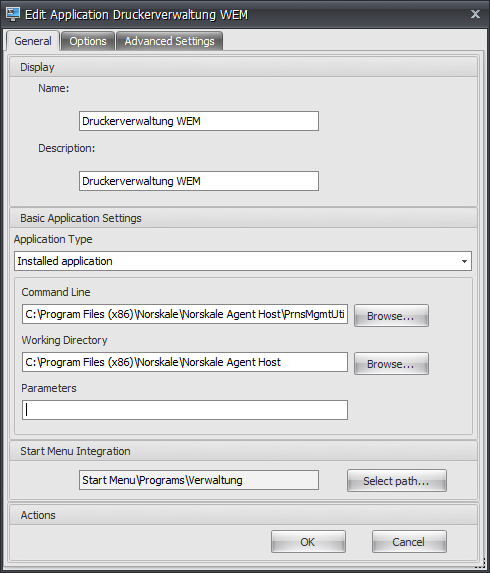
Create a New application and configure it as follows:
Name: WEM Manage Printers
Description: WEM Manage Printers
Application Type: Installed application
Command Line: C:\Program Files (x86)\Norskale\Norskale Agent Host\PrnsMgmtUtil.exe
Working Directory: C:\Program Files (x86)\Norskale\Norskale Agent Host
Parameters: -
Additional notes
This article was previously published on my blog written in German in the year 2015. As I find it still relevant today in 2019, I translated and extended it to include up-to-date information:
XenApp 7.6: Druckerverwaltung Classic als Published Application zur Verfügung stellen
This blog article was previously published on mycugc.org:
mycugc.org
Source: http://support.citrix.com/article/CTX884335